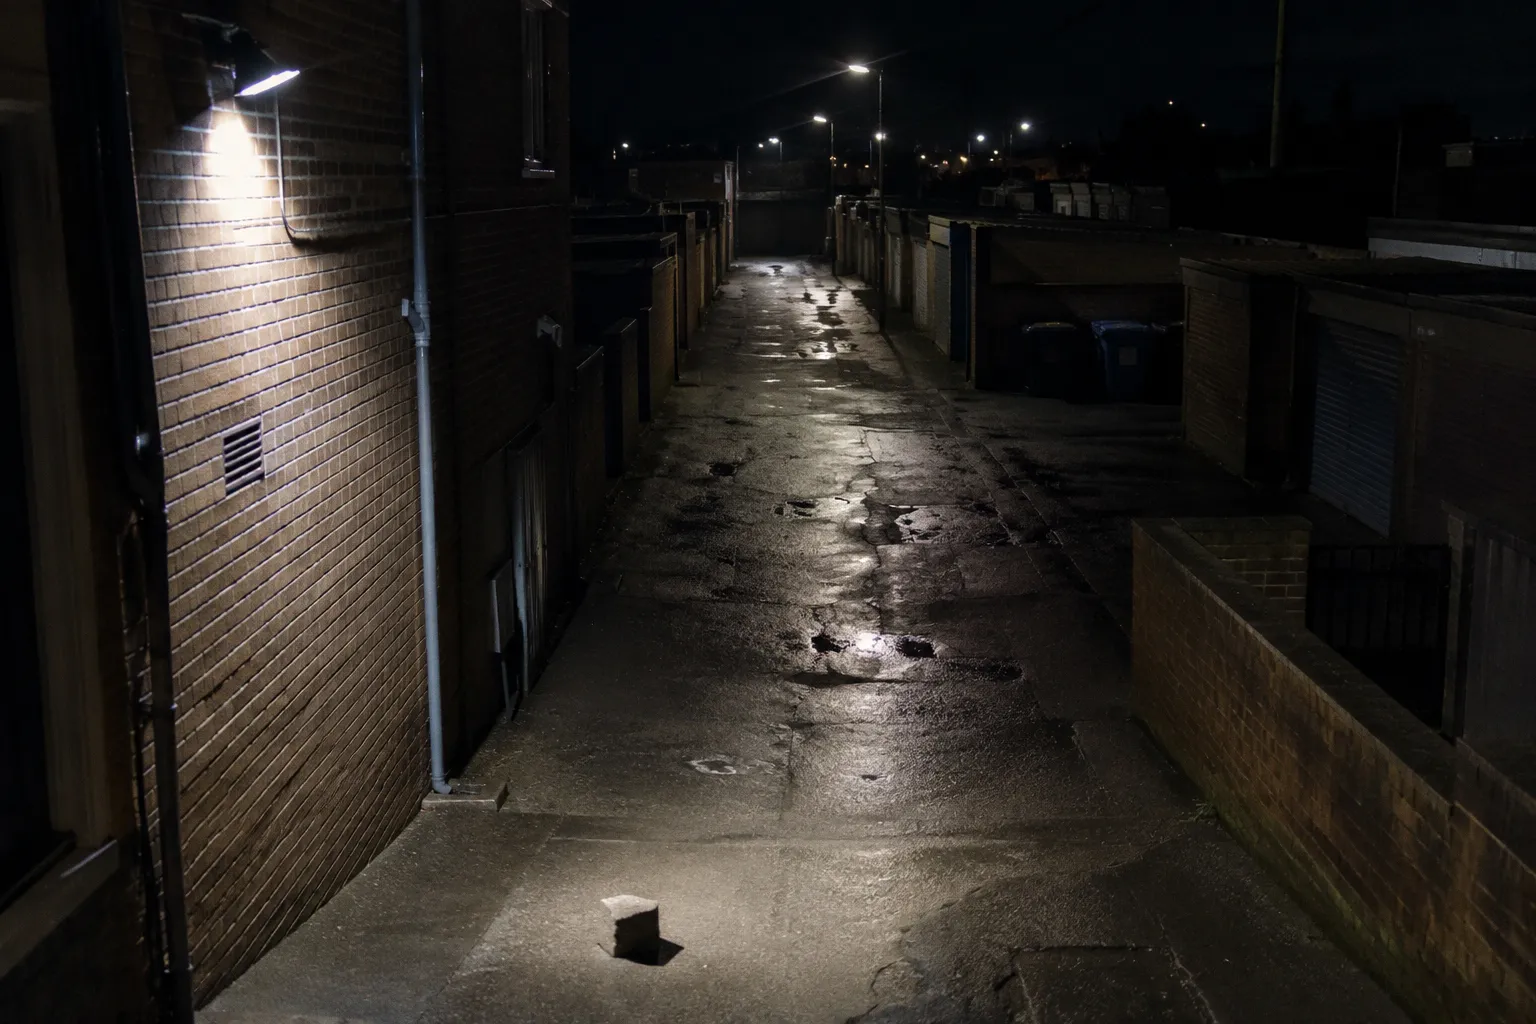
The unit is visible from the street, the lamp throws a dramatic burst of light across the frontage, and yet the approach to the door remains outside the useful part of the detection pattern.
This Grimsby case study is a worked scenario rather than a claim about a recorded local incident. Consider a typical terraced or semi-detached property: a PIR floodlight is fixed high on the fascia or soffit, aimed towards the road. Its beam reaches well beyond the front path, while the ground immediately below the sensor sits in a weak or poorly covered part of the detection zone. Someone approaching directly from the pavement may not cross the sensor’s strongest detection segments until they are already close to the entrance.
That is the practical problem behind many PIR security light placement mistakes. The light is not necessarily faulty. The installation is asking it to detect the wrong movement, from the wrong height, across the wrong part of the property.
A sensor mounted high and aimed into open air may announce that a security device is present without reliably covering the approach to the door.
The same issue can arise on a quiet residential road, a rear passage, a side return or an alley gate. It should not be presented as proof of a local crime pattern or as evidence that one arrangement is common across North East Lincolnshire. The useful question is narrower: if an intruder approached this particular property, where would the sensor actually detect them?
The Mechanics of PIR Failure: Why Intruders Bypass Sensors
A passive infrared sensor is not a camera. It does not form a picture of a person standing in front of it. Instead, it detects changes in infrared radiation across a set of zones created by the lens. A moving warm body crossing those zones produces a change in the thermal pattern, and the electronics decide whether that change is large and rapid enough to trigger the light.
That distinction matters because movement has direction.
A person walking from left to right across the face of a sensor will usually cross several detection zones in succession. The change is relatively clear. A person walking directly towards the lens presents a less useful pattern: the sensor may see a slower change, with less movement between zones. Depending on the unit, the distance and the angle, the trigger may be delayed or may not occur at the point where the homeowner expects it.
This is why an approach path should not automatically point straight at the sensor. In many situations, the better arrangement is to place the unit to one side of the path so that a person crosses the detection field rather than follows it head-on.
The second issue is the shape of the field itself. A PIR does not create an even bubble of coverage around the fitting. Its zones spread outward from the lens and are affected by the lens design, the tilt of the head, the mounting height and anything that obstructs the view.
A wall, hedge, porch column, gate, bin or climbing plant can create a blind area. The sensor may still detect movement beyond the obstruction while missing the short section of path behind it. That can be more misleading than an obviously unprotected area because the homeowner sees the light activate at other times and assumes the whole approach is covered.
There is also a difference between the lamp’s spread and the sensor’s detection pattern. A wide floodlight beam can illuminate a road, neighbouring frontage or upstairs window while the PIR’s useful zones remain concentrated elsewhere. Brightness is not proof of detection. A high-lumen lamp aimed at the wrong place is still aimed at the wrong place.
The common installation error is to treat visibility as security. A fitting mounted high on the front of a house is easy to see and may look properly positioned. But a sensor is not a sign. It needs a clear view of the movement it is meant to detect, at a height and angle that suit its lens.
What the sensor should be asked to detect
Before moving the bracket, define the event that should switch the light on. It might be:
- someone entering from the pavement through the front gate;
- a person crossing the side return after opening or climbing over a gate;
- movement between a rear gate and the back door;
- someone approaching a ground-floor window from a garden;
- a person crossing an indoor hallway or the bottom of a staircase.
Each event has a different line of movement. A sensor aimed at the street may detect passing pedestrians and vehicles while missing the person who turns into the garden. A unit on the rear wall may see the garden but not the narrow section beside the shed. The fitting has to be assessed against the route, not against the wall on which it is mounted.
The Geometry of Detection: Mounting Height and Angle Optimisation
Mounting height and angle determine the part of the property that the sensor can usefully read. There is no single height that works for every product, so the manufacturer’s installation range should take priority. As a practical starting point, many outdoor PIR floodlights work best when mounted around normal head-and-shoulder height or somewhat higher, commonly in the region of 1.8 to 3.0 metres, provided the lens can still be tilted towards the ground.
The upper end of that range is not automatically better. Raising the sensor can make it harder to reach or tamper with, but it can also leave a larger area directly beneath the fitting in a weak detection zone. A unit placed high on a gable or at the top of a two-storey wall may cover the far garden while missing the doorstep and the first few metres of the path.
The angle needs equal attention. The lamp and the PIR lens may share one housing, but they do not necessarily cover the same area. A head tilted down towards the approach generally gives the sensor a more useful view of ground-level movement. A head tilted upwards can send light into the sky and reduce the part of the detection field that falls on the path.
This is also where glare becomes a security problem. If a floodlight shines directly into the upstairs windows of another house, reflects from a pale wall or fires across the road, the result is not simply poor neighbourly etiquette. Repeated nuisance activation makes people less likely to pay attention when the light comes on. It can also make the homeowner shorten the timer or disable the unit altogether.
| Parameter | More useful arrangement | Common placement error |
|---|---|---|
| Mounting height | Within the product’s outdoor installation range, with a clear view of the approach | Fixed as high as possible without checking the dead ground below |
| Sensor direction | Across the path or gate, so movement crosses the detection zones | Pointed directly along the approach |
| Lamp angle | Down towards the path, gate or ground-floor frontage | Flat or tipped towards the road and upper windows |
| Coverage target | The point where a person enters, turns or crosses the property | The widest visible area, regardless of footfall |
| Obstructions | Clear line of sight around bins, hedges, columns and gates | Assuming the sensor can see through or around them |
| Glare control | Light contained within the property boundary | Bright spill into roads, gardens and neighbouring windows |
A 45-degree downward angle can be a useful starting point for some combined floodlight units, but it is not a universal rule. The correct setting depends on the lens, the bracket, the wall height and the area that needs covering. The test is simple: stand where a person would approach and check whether the sensor is aimed at that route rather than merely at the horizon.
Indoor PIRs follow the same principle, although the distances and lens patterns are different. A hallway sensor generally works better when mounted to watch people crossing the hall than when aimed directly at the front door. A sensor at the bottom of the stairs should cover the route through the hall, not just the door panel. The aim is to detect movement within the protected space, not to stare at a fixed object that may change temperature.
The bracket is part of the detection system. Height, tilt and direction decide what the electronics are capable of seeing.
Thermal Interference and False Triggers in Residential Settings
A sensor that activates for the wrong reasons creates a second kind of blind spot. After enough false triggers, occupants stop treating the light as information. They may ignore it, reduce its sensitivity, shorten the operating period or switch it off. The device remains installed, but the link between activation and response has been weakened.
Outdoor PIRs can react to sudden changes in heat within their field of view. Common sources include direct sunlight on a window or conservatory roof, warm air from a boiler or tumble-dryer outlet, ventilation discharge, reflective surfaces and rapidly changing patches of sun and shade. Moving foliage can also cause trouble by repeatedly altering the thermal background or by physically interrupting the sensor’s view.
The issue is not that the sensor can recognise a boiler flue as a boiler flue. It cannot. It responds to changes within the detection zones. If a warm exhaust plume crosses the field, or sunlight heats a surface and then disappears behind a cloud, the thermal change may resemble movement to the unit.
Placement is usually the first correction:
- Do not aim the sensor at a boiler flue, cooker or tumble-dryer outlet.
- Keep direct views of large areas of glass to a minimum where sunlight can change sharply.
- Trim branches that move across the detection zones in wind.
- Check whether a light-coloured wall is reflecting the lamp back into the sensor housing.
- Keep the view clear of hanging baskets, flags, washing and loose plastic sheeting.
- Avoid placing the unit where rainwater runs across the lens or where condensation repeatedly forms.
A conservatory is a particularly awkward background because its surfaces can heat and cool differently from brickwork. If the only practical location is near one, the sensor should be oriented across the access path while keeping as much of the glazing as possible outside the main detection area.
The same principle applies to side returns. A sensor aimed down a narrow passage may catch warm air from a vent, movement of a neighbouring tree or sunlight reflecting from a white wall. Turning it slightly so that it watches the route across the passage, rather than the end wall, can reduce both false triggers and the head-on detection problem.
Sensitivity is not a substitute for placement
Adjusting sensitivity can help fine-tune a working installation, but it cannot repair a fundamentally poor field of view. Turning the control up may cause the unit to react to distant traffic, foliage or animals. Turning it down may suppress the nuisance activations while also losing the person the system is meant to detect.
Use the controls after the physical arrangement is right. Test the unit at the edges of the intended area and observe how quickly it reacts to different directions of movement. If it activates only when someone is already standing at the door, the sensor is probably too far out, too high, too steeply tilted or aimed along the approach.
False triggers and missed triggers often have the same cause: the sensor is watching an uncontrolled thermal background instead of the route through the property.
Strategic Sensor Placement: Mapping Your Property’s Vulnerabilities
The most useful audit begins at the pavement, not at the wall where the existing light is fixed. Look at the property as a sequence of approaches and transitions.
Where does someone leave the public path? Where can they turn towards the door? Is there a gate, hedge, bin store, low wall or parked vehicle that changes the route? Does the side gate open into a narrow passage? Does the rear path force people to cross a particular point before reaching the back door?
Those transition points matter because they give the sensor a defined movement to detect. A person stepping through a gate can be caught by a unit mounted on the property side and angled across the opening. A person approaching a front door may be better detected by a sensor beside the porch, aimed across the path, than by one directly above the door pointing out towards the pavement.
The audit should also account for the areas that are not obvious from the front:
1. Front approach: Identify the route from the pavement to the door, including the gate, steps and porch threshold. Position the sensor so that movement crosses its field rather than runs directly towards the lens. Keep the road and neighbouring windows outside the main area of illumination where possible.
2. Side return: Treat the gate as a separate access point. A front light may not see somebody who turns into a narrow side passage. A dedicated unit can cover the point immediately after the gate, but it should not be fixed where the gate itself repeatedly blocks the lens or strikes the fitting.
3. Rear elevation: Cover the route between the rear gate, shed, patio and back door. A sensor mounted on a shed may be vulnerable to damage and may activate too late if the shed is the object being approached. The house wall often provides a more stable mounting point, but the sensor still needs a clear view around corners and stored items.
4. Ground-floor windows: Lighting should not simply wash the whole rear elevation. Consider the route a person would take to reach a window, then place the sensor to cross that route. Avoid aiming directly at reflective glass if it causes glare or thermal instability.
5. Indoor circulation: Hallways, stair landings and the route between external doors and the main living area are usually more useful detection locations than rooms filled with furniture. A PIR in the living room may be activated by pets or may fail to tell you which access route has been used.
6. Obstruction changes: Recheck the field after putting out bins, adding a porch screen, storing bicycles or allowing a hedge to grow. A sensor that worked in an empty garden can lose its useful view when the property changes around it.
A worked Grimsby frontage
Take a hypothetical East Marsh terrace with a short front path, a low gate and a porch close to the pavement. The existing floodlight is attached beneath the soffit above the front window. It faces outward, so the lamp illuminates the street and the sensor detects movement best across the road. The person walking through the gate approaches almost directly towards the lens.
A better arrangement would begin with the gate and porch, not with the existing cable position. The fitting could be moved to a side wall near the porch, subject to the product’s installation requirements and safe electrical work. Its sensor would then be aimed across the path, with the light directed down towards the entrance. The point is not to create a brighter beam. It is to make the person cross the detection field before reaching the door.
If the side gate leads to a rear passage, the front unit should not be expected to cover it. The side return needs its own assessment. A second sensor may be appropriate, or the existing unit may be repositioned if the whole frontage can still be covered. The right choice depends on the line of sight, the power supply, the manufacturer’s stated coverage and the risk of nuisance activation.
This scenario illustrates the difference between a visible deterrent and a functioning detection point. It does not establish that this arrangement is responsible for local burglaries, nor that one layout is prevalent across Grimsby or North East Lincolnshire. It is a way to test a property without borrowing certainty from unsupported crime statistics.
Alleys, gates and shared access
Properties around shared alleys create an additional placement problem. A sensor installed on a gate can be exposed to impact, vibration, weather and repeated movement. It may also cover the wrong side of the boundary. If the gate is the perimeter, the useful detection point is often just inside it, where a person has entered the property and must cross a defined route.
Shared access requires restraint as well as coverage. A floodlight that fires across a communal alley or directly into another property can become a nuisance and lose its practical value. Shielding, a narrower beam, a shorter timer and a more carefully aimed sensor may produce better security than simply increasing brightness.
Lighting should help a resident see the approach and notice activity. It should not turn the whole street into an uncontrolled glare field.
Testing the Installation After Dark
Daylight hides many placement errors. A sensor can appear to cover the path when the boundary of its field is difficult to see, while glare and reflections are only obvious once the lamp activates.
Testing should be deliberate rather than limited to waving a hand beneath the unit. Walk the route at a normal pace:
- approach from the pavement;
- cross the gate line;
- turn towards the porch;
- walk along the side return;
- move from the rear gate towards the back door;
- pass close to walls, bins and other likely obstructions.
Allow the timer to reset between tests. Note where the light activates, how long it takes and whether the lamp points at the route or beyond it. Test from both directions because a PIR may respond well to lateral movement one way and poorly to a near head-on approach the other.
If the unit does not activate until the person is almost at the door, do not begin by buying a brighter lamp. Check the mounting height, lens tilt and direction first. If it activates every time a car passes, a tree moves or a warm vent discharges, change the field of view before reducing sensitivity.
A simple record can be useful:
| Test position | Expected response | What a miss may indicate |
|---|---|---|
| Before the gate | Optional, depending on the security objective | The unit is aimed too far inside or cannot see the approach |
| Just inside the gate | Early activation | Gate, wall or hedge is blocking the sensor |
| Midway along the path | Reliable activation | Detection zones are crossing the route effectively |
| Close to the door | Light should already be on | The sensor is too far away, too high or aimed along the path |
| Side or rear passage | Separate response if protected | The main frontage unit is being asked to cover an area outside its field |
Do not test by climbing, leaning over gates or interfering with electrical fittings. Where a wired unit needs to be moved, use a qualified installer. The practical principle is straightforward, but the electrical work still has to be safe and compliant.
The Audit Is the Fix
There is no basis for saying that most PIR problems in North East Lincolnshire, or in any other locality, are installation failures. A particular property may have a faulty sensor, a damaged lens, poor wiring, depleted backup batteries or a control that has failed. But installation is the sensible place to begin because height, angle, direction and obstruction can be checked without assuming a component has broken.
A useful audit asks four questions:
1. Is the sensor looking at the route a person would actually take?
2. Will that person cross the detection zones rather than walk directly into the lens?
3. Is the ground immediately around the entrance covered, or is there a dead patch beneath the fitting?
4. Could sunlight, warm air, foliage, reflective glass or neighbouring movement trigger the unit instead?
If the answer is no, the fitting may be providing light without providing useful detection. That is the difference between exterior security lighting blind spots and a properly planned arrangement.
Floodlight glare is not burglary prevention. A conspicuous lamp can contribute to deterrence, but deterrence works best when it is backed by clear visibility of the approach, controlled illumination and a sensor that responds at the point where movement matters. The aim is not to flood every window and pavement with light. It is to make the relevant route harder to use unnoticed.
In a Grimsby terrace, a Cleethorpes semi or any similar property, the starting point is the same: map the approaches, identify the crossings and then aim the PIR at them. The technology can only respond to the view given to it. Get the geometry right, remove the thermal distractions and the device has a chance to do its job. Leave it high, flat and pointed at the road, and it may remain little more than a bright piece of hardware on the wall.