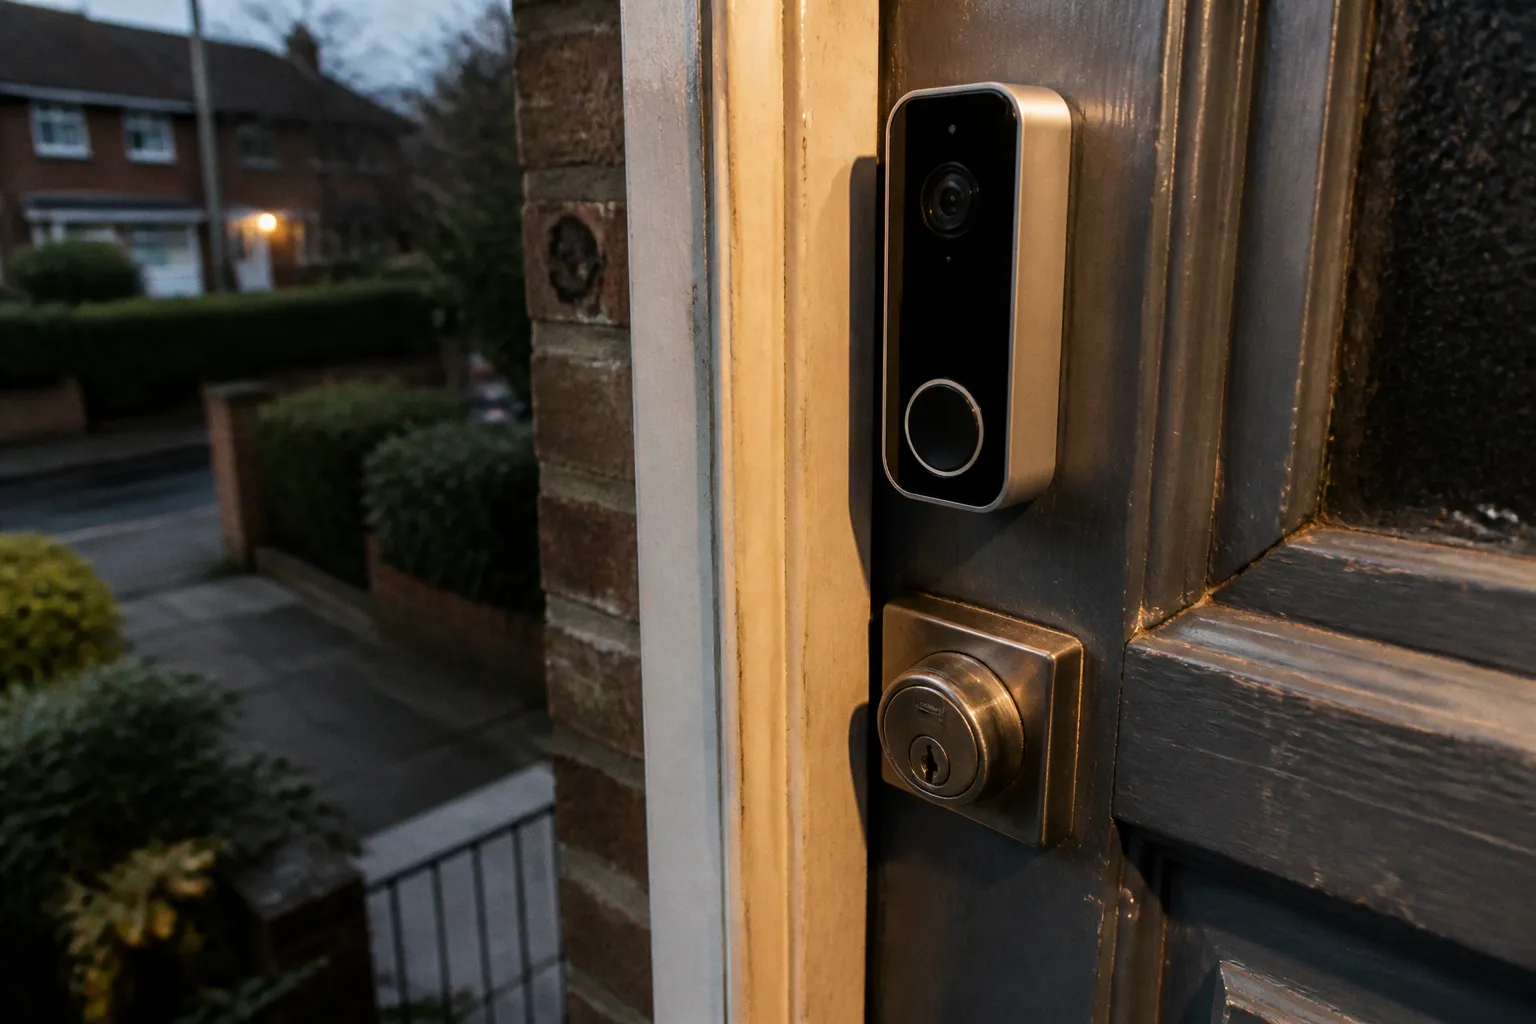
A camera pointed at the sky, a door sensor fixed to the wrong side of a frame, or an alarm nobody knows how to reset may look reassuring on the wall, but it will not do much to make a property harder to enter.
That is the question I hear repeatedly at neighbourhood meetings and on the doorstep across North East Lincolnshire: should residents install their own alarm and cameras, or pay someone to do the job properly? The honest answer is that both approaches can work. The difference is not simply the price of the equipment. It is the planning, the standard of installation, the level of support afterwards and what you expect the system to prove if something goes wrong.
A careful DIY installation can be perfectly sensible for a straightforward property. Professional installation becomes more valuable as the layout, insurance requirements and expectations around monitoring become more demanding.
The Financial Trade-Off: Upfront Costs vs Long-Term Reliability
The attraction of DIY security upgrades is obvious. A basic wireless alarm kit in the UK typically costs between £150 and £400. Doorbell cameras, motion sensors, exterior lights and connected locks can be added gradually, often without paying for an engineer to visit or signing up to a monitoring contract.
A professionally installed intruder alarm generally starts at around £600 and rises according to the size and layout of the property, the grade of the system and whether monitoring or a response service is included. That is a significant difference in the first week. Anyone comparing DIY home security upgrades versus professional installation should acknowledge it rather than pretending that the cheaper option is always a false economy.
The difficulty is that the purchase price is only one part of the calculation.
With a DIY system, you are also taking responsibility for:
- deciding which doors, windows and approaches need covering;
- checking that sensors communicate reliably from their chosen positions;
- setting up user accounts, permissions and notifications;
- maintaining batteries and replacing failed devices;
- keeping firmware and applications up to date;
- checking whether video footage is stored locally or in the cloud;
- making sure you can retrieve that footage when it matters;
- explaining the system to everyone who uses the property.
None of that is especially difficult in isolation. The problem comes when several small decisions interact. A camera may record clearly during the day but produce a poor view at night. A motion detector may work in testing but be triggered repeatedly by a radiator, a pet or moving foliage. An alarm may send notifications to one phone while the person who is actually at home has no access.
The cheapest security system is the one that works when someone tries your back door at midnight. The most expensive is the one that looked convincing in the box.
That is why long-term reliability matters more than the number of devices on the shopping list. Six poorly positioned cameras do not necessarily provide better protection than two cameras covering the right approaches. A smart lock is not automatically an improvement if the existing door, frame or cylinder is the weak point. A visible alarm box may add a useful layer of deterrence, but it cannot compensate for an unprotected side gate or a rear boundary that gives easy access.
Comparing the two routes
| Consideration | DIY installation | Professional installation |
|---|---|---|
| Initial cost | Usually lower, with equipment bought directly | Higher because the survey, labour and system design are included |
| Flexibility | Easy to add individual cameras or sensors over time | Usually designed as one connected system from the beginning |
| Responsibility for layout | Falls on the homeowner | The installer assesses entry points, blind spots and device positions |
| Standards and certification | Depends on the equipment and the way it is installed | May provide recognised certification where the installer and system qualify |
| Fault-finding | The homeowner normally diagnoses the problem | Ongoing support may be available, depending on the contract |
| Monitoring | Optional and often app-based | Can include professional monitoring and a response arrangement |
| Best suited to | Simpler properties and residents willing to manage the system | Complex layouts, higher-risk homes and formal insurance requirements |
The question is not whether professional installation is always worth the money. It is whether the extra money buys something relevant to your situation: a better risk assessment, compliant installation, dependable monitoring, a clear maintenance arrangement or documentation that an insurer will accept.
When people search for home security upgrades in Grimsby, Cleethorpes or Immingham, they are often comparing equipment prices first. That is understandable. But the more useful comparison is between the complete outcomes. A cheap kit that is installed carefully and maintained may be enough for one home. A more expensive system may be justified for another because the property has several access routes, vulnerable outbuildings or a policy requirement that cannot be met by a self-installed device.
Navigating UK Standards: BS EN 50131 and NSI Gold Accreditation
This is where the language around alarms can become unnecessarily confusing. BS EN 50131 is the standard used for intruder alarm systems and their components. It sets out grades of security associated with different levels of risk, from Grade 1 for lower-risk situations through to Grade 4 for high-risk and specialist applications.
The grade is not a general score saying that one alarm is good and another is bad. It relates to the type of threat the system is designed to address and the resistance expected at that level. A homeowner should therefore be wary of treating a grade as a standalone buying instruction. The system still has to be appropriate for the property and installed in a way that matches its intended performance.
NSI Gold accreditation relates to the company and its installation processes, not simply to a product sitting in a box. A firm operating under that accreditation has been independently assessed against relevant requirements, including the competence of its engineers and the way installations are managed and documented. That distinction matters. Buying an alarm that mentions a recognised standard is not the same as having a certified installation carried out by an appropriately accredited company.
Some insurers may ask for a particular grade, an accredited installer or evidence that an alarm is maintained and monitored. Requirements vary, so the policy wording is the starting point. If an insurer has made BS EN 50131 compliance, NSI Gold installation or a particular monitoring arrangement a condition of cover, a self-fitted system may not satisfy the requirement even if the equipment itself is capable of meeting a technical specification.
The same caution applies to police response. Alarm response policies are not identical everywhere and can depend on the type of system, verification arrangements and local procedures. Residents should check the current position with Humberside Police rather than assuming that any alarm activation will produce a police attendance.
What to ask before agreeing to an installation
A professional quote should explain more than the number of sensors included. Ask the installer to set out:
- which risks were identified during the survey;
- which doors, windows and internal areas will be covered;
- the proposed alarm grade and why it is suitable;
- whether the equipment and installation meet the requirement in your insurance policy;
- whether the company holds the accreditation being advertised;
- what happens if the system develops a fault;
- what maintenance is included and how often it is required;
- whether monitoring is optional or built into the price;
- how keys, access codes and user permissions are managed;
- what documentation you will receive after completion.
A vague quote is not necessarily evidence of poor workmanship, but it makes comparison difficult. Professional target hardening cost is easier to judge when the quote connects each measure to a specific vulnerability. Replacing a weak door cylinder, improving a side gate and moving a camera away from glare may provide more useful protection than adding another device simply because it appears on a standard package.
DIY equipment can still have a place. A homeowner may buy a capable alarm or camera system and install it carefully without needing a formal accreditation. The important point is to understand what that purchase does not provide: it does not automatically create an accredited installation, guarantee an insurance discount or arrange a response service.
Why Improper Camera Angles Account for About 25% of DIY Installation Errors
The frequently repeated percentage needs to be described accurately. It does not mean that a quarter of DIY cameras are inadequate. The figure refers to improper camera angles accounting for about 25% of reported DIY installation errors.
That is still a useful warning because camera positioning is one of the easiest parts of a security installation to get almost right while missing the detail that matters. A device can be powered, connected to Wi-Fi and producing a sharp image, yet fail to capture an identifiable view of the person approaching the property.
Common problems include:
1. Mounting the camera too high. A high position may provide a wide overview, but the image can show the top of a head rather than a face. It may also make it harder to establish how someone reached the door or gate.
2. Pointing at the wrong stretch of ground. The most visually obvious location is not always the most useful one. A front-door camera aimed straight at the doorstep may miss the approach from a path or side passage.
3. Ignoring changing light. Sun glare, reflective surfaces and strong background lighting can make daytime footage difficult to use. At night, infrared illumination may reflect off a nearby wall, soffit or cover.
4. Leaving blind spots between views. Two cameras can appear to cover the front and side of a property while leaving the corner by the gate or the route to the rear completely unobserved.
5. Failing to test the view at realistic times. A camera checked at midday may behave differently after dark, in rain or when a porch light is switched on.
The remaining installation errors identified in the same industry discussion include incorrect device placement, insufficient planning and failure to follow the user manual. Sensors may be installed in rooms that do not need them while the actual route to an entry point remains uncovered. Motion detectors can be aimed across sources of heat or movement. Door contacts can be attached where the two parts do not align properly when the door is closed.
These are not dramatic failures. They are ordinary installation mistakes, which is precisely why they are easy to overlook. The system appears active. The app sends a notification. The alarm responds when tested. Yet the arrangement may not deliver useful evidence or an early warning in the circumstances that matter.
A practical camera-positioning test
Before fixing a camera permanently, stand at the likely approach points and consider what the device needs to show:
- Can it capture a face rather than only a body or head covering?
- Does the frame include the route to the door, not just the threshold?
- Is a nearby lamp creating glare?
- Will a parked vehicle, open gate or seasonal foliage block the view?
- Does the camera overlook a neighbour’s window or garden unnecessarily?
- Is the device protected from being easily reached or turned away?
- What does the image look like after dark?
- If the internet connection fails, is there any local recording or other fallback?
Privacy is part of competent installation as well. A camera should be directed at the relevant part of your own property wherever possible, with privacy masking or other settings used when neighbouring areas cannot be avoided. The legal and practical position can vary with the field of view and how footage is handled, so the homeowner should not treat privacy settings as an optional extra.
The reliability of DIY home security systems is often discussed as though it were a property of the brand alone. In practice, reliability also depends on power, connectivity, placement, maintenance and the person responsible for checking alerts. A device that works well in a test is not necessarily a dependable security arrangement if nobody notices that its battery is low or its connection has dropped.
Applying Secured by Design Principles to Your Property Layout
Electronic security should not be asked to solve a physical layout problem on its own. If a side passage provides concealed access to the rear, improving the boundary and visibility may matter more than adding another indoor sensor. If a front garden is hidden behind a tall hedge, a camera may record an intrusion without preventing it.
Secured by Design is the official police initiative associated with crime prevention standards for buildings, homes and layouts. Its principles are generally recommended because they connect security with visibility, access control and the way people move around a property. They are not a guarantee that a particular street or house will be free from crime, and they should be applied with the actual layout in front of you.
At the front boundary, guidance commonly recommends keeping walls, fences and hedges to no more than one metre where visibility is important. The purpose is natural surveillance: neighbours, passers-by and visitors should be able to see the approach to the front door and windows. A tall solid fence may provide privacy, but it can also conceal somebody working at the entrance.
The rear boundary has a different function. Fencing of at least 1.8 metres, with around 0.3 metres of trellis above it, is commonly used as a deterrent to climbing. The trellis is not a structural wall and should not be treated as one. It is intended to make the top of the boundary more difficult to use, particularly when combined with a secure gate, suitable lighting and clear visibility around the access route.
The details need to fit the property. A boundary that is secure at the rear can still be undermined by a gate that is left open, a bin store that acts as a step or a shed that provides a concealed route. Lighting should avoid creating deep contrast or shining directly into a camera. Planting should not grow into a position where it blocks windows, cameras or sight lines.
Good security is not about hiding a property behind fortress walls. It is about improving visibility, controlling access and making suspicious activity harder to carry out unnoticed.
Look at the route, not just the device
Walk around the property as if you were checking how someone could approach it. Pay attention to:
- the side gate and whether it can be reached without being seen from the street;
- fences that meet at hidden corners;
- ladders, bins, planters or furniture that could assist climbing;
- garage doors and internal doors linking the garage to the house;
- rear windows concealed by extensions, porches or dense planting;
- sheds and outbuildings containing tools that could be used to force entry;
- lighting that leaves a face in shadow;
- house numbers that are difficult for emergency services or visitors to see.
This is where the principles can be useful in Grimsby, Cleethorpes, Immingham and elsewhere in North East Lincolnshire, but the result will depend on the individual street and property. A recommendation that improves visibility on one frontage may be unsuitable for a home where privacy, access or planning constraints are different. The point is not to apply a universal formula. It is to reduce concealment and make the likely route to an entry point more visible and controlled.
A professional survey should include this physical assessment. A DIY approach should include it too. The fact that a camera is the first item people notice does not make it the first security decision to make.
When Professional Expertise Outweighs the DIY Savings
I am not anti-DIY. Some of the most sensible improvements on local streets have been made by residents who researched the problem, bought suitable equipment and took care over the installation. A correctly positioned doorbell camera, a properly secured back door, a motion-activated light over an alley or a lock upgrade can all be worthwhile without a professional installer.
DIY is most defensible when the property is straightforward, the risks are understood and the homeowner is prepared to maintain what they install. It also makes sense when the goal is a modest improvement rather than a certified, monitored alarm arrangement.
Professional expertise becomes more valuable when the margin for error is small. That includes properties with several entry points, accessible windows, detached garages, long side passages or multiple buildings. It also includes homes where an insurer has specified a recognised grade, maintenance arrangement or accredited installer.
There are several signs that a survey is worth paying for:
- You cannot identify the most likely route of approach.
- The property has several blind spots or separate structures.
- Previous DIY devices have produced false alarms or unusable footage.
- You want professional monitoring and a defined response arrangement.
- Your insurance documents refer to BS EN 50131, NSI Gold or another specific condition.
- Different members of the household need different access permissions.
- You are combining an alarm, cameras, access control and lighting rather than installing one device.
- You need the system documented for a landlord, insurer or future owner.
A professional installer should not simply add equipment until every wall has a sensor. Good work begins with a survey and a conversation about how the household uses the property. A rear door that is never used may need a different approach from the entrance used by children, carers or delivery staff. An alarm that is technically sophisticated but routinely disarmed because it is inconvenient is not a successful installation.
The same applies when comparing firms. Ask neighbours who they used, but treat a recommendation as a starting point rather than proof of accreditation or suitability. Check what the installer is actually accredited to do, what the quote includes and what happens after the work is complete. A low price may omit maintenance, monitoring, a follow-up visit or the documentation an insurer expects.
If a previous DIY system is not performing properly, do not automatically replace every component. A professional assessment may identify a simpler problem: a camera needs repositioning, a sensor needs moving, a network access point needs improving or the notifications have been configured badly. In some cases, the most cost-effective professional target hardening cost is the fee for understanding the existing weaknesses before buying more equipment.
The right decision can be expressed simply, even if the work behind it is not. Use DIY upgrades when you can clearly define the vulnerability, install the equipment correctly and remain responsible for testing and maintenance. Choose professional installation when the layout is complex, formal standards matter or you want someone else to carry responsibility for design, certification and ongoing support.
The goal is not to spend the most money. It is to make the home a less convenient target and to ensure that the measures you have paid for work together. Sometimes that means a carefully installed £200 kit. Sometimes it means a professional system designed around BS EN 50131, with the paperwork an insurer requires and a monitoring service that fits the household.
Security also improves when residents compare notes. If a camera misses the only approach to a gate, other people on the street may have noticed the same problem. If a contractor has done careful work, neighbours can benefit from that experience. Local Neighbourhood Watch coordinators and safer neighbourhood teams are useful points of contact when residents need to raise recurring concerns or understand what support is available.
Community intelligence is not a substitute for a good lock, a sensible boundary or a properly positioned camera. It is what helps those measures reflect the reality of the street. Share what you have learned, question installations that do not make sense and do not mistake a full wall of technology for a secure home.